 |
| Mother and babies (another Super Glue placement) |
Moon-Glo Lighting
 For some time, I have been drooling over the idea of having moon-glo lighting. It provides a cool lunar look and extends the viewing hours. Since I am happy with my low-end lighting system and don't want to invest a lot of time and money in a new system, I decided to try a do-it-yourself hack. My local automotive store had a blue LED strip for about $14. It has 8 LEDs and runs off of 12 volts DC. I mounted the lights on a narrow strip of plexiglass that fits under my light hood. I connected the lights to a power brick that I made from spare parts and a Radio Shack project box. When I powered them on, they produced a lot of light. It makes the tank look great when I run them with my daylight bulbs, and even creates a small shimmer. I have the lights on timers so that I get an hour of "moonlight" after the daylight bulbs turn off. It adds a really nice effect...
Day 47, July 13 - Six new additions....
Four days ago I added 6 soft coral frags that I bought from Penny at AquaCorals. They made a successful transition and have opened beautifully.
Here is what I got:
Red Mushroom
Blue Mushroom
Silver Pom Xenia
Stiped Pulsing Xenia
Mint Green Star Polyps
Gold Capnella
This is how it looks....


Here is what I got:
Red Mushroom
Blue Mushroom
Silver Pom Xenia
Stiped Pulsing Xenia
Mint Green Star Polyps
Gold Capnella
This is how it looks....

The gereral layout....


Left half of tank.


Right side of tank


Silver Pom Xenia

Mint Green Star Polyp

Gold Capnella
Pulsing Xenia Video. It is Hypnotic.
-JFW
Daily Care
Even though people think that keeping a reef tank is a difficult challenge, the big secret is that it is actually very easy. The most important way to care for a reef tank is to observe it every day. If you pay attention to your tank and understand its needs, you will notice potential problems as they start to develop. Addressing these issues as soon as you see them will prevent big headaches down the line. Understanding how the variables such as waterflow, light, position, salinity and temperature effect the reef inhabitants is crucial. A slight correction can make a sad looking coral thrive.
The only additive I put in the tank is Kalkwasser (Calcium Hydroxide). I mix a bit with fresh R/O water and use it to replace the water that evaporates from the tank. This helps maintain high calcium and alkalinity. Since it has a very high pH, I fabricated a "high tech" system to slowly drip the solution into my tank every morning.

A good cleanup crew is essential for eating algae and detritus and keeping the sand bed groomed. I have Astrea, Certh and Nerite snails and 2 small blue legged hermit crabs. I have only scraped the front glass once and I added a few more snails when they were needed.
I am most excited about Super Glue Gel. It does a great job under water and has quickly secured several small frags exactly where I want them. I also use underwater epoxy to secure larger pieces.
To get rid of Aiptasia anemones people highly recommend Aiptasia-X. Before I purchased an entire bottle for one Aiptasia, I tried a trick I found online. I got an insulin syringe and filled it with a mixture of Kalkwasser and water. After a quick injection I have not seen another Aiptasia in the tank.
I did my first 1 gallon water change after 29 days and I plan to do one every week or so. I do not sift the sand when I do a water change, but when I add the new water to the tank, I try to blow accumulated detritus off the rocks. The corals love the micro-nutrients after a water change and are always fully open and spectacular then next day.
-JFW
The only additive I put in the tank is Kalkwasser (Calcium Hydroxide). I mix a bit with fresh R/O water and use it to replace the water that evaporates from the tank. This helps maintain high calcium and alkalinity. Since it has a very high pH, I fabricated a "high tech" system to slowly drip the solution into my tank every morning.

A good cleanup crew is essential for eating algae and detritus and keeping the sand bed groomed. I have Astrea, Certh and Nerite snails and 2 small blue legged hermit crabs. I have only scraped the front glass once and I added a few more snails when they were needed.
 |
| This Certh snail likes to hang out under the sand. |
I am most excited about Super Glue Gel. It does a great job under water and has quickly secured several small frags exactly where I want them. I also use underwater epoxy to secure larger pieces.
 |
| These particular polyps were opening after my first experience with Super Glue Gel. Unfortunately, the rock got overturned when I was on vacation and the polyps did not make it. |
I did my first 1 gallon water change after 29 days and I plan to do one every week or so. I do not sift the sand when I do a water change, but when I add the new water to the tank, I try to blow accumulated detritus off the rocks. The corals love the micro-nutrients after a water change and are always fully open and spectacular then next day.
-JFW
Day 29, Jun 25, 2011
Coralline algae is starting to develop on every rock. The coralline is desirable. In addition to looking good, I want it to cover the rocks instead green hair algae and red slime algae. Good water quality is key to algae control. High pH, no ammonia, no nitrite, zero or near zero nitrates. Reverse osmosis water prevents additional phoshorus and nitrates. High quality salt replenished micro-nutrients. I started adding Kalkwasser to the freshwater top-off. This boosts the pH and adds calcium. I am running both lights for 8 hours and will gradually increase it to 10-12 hours a day.

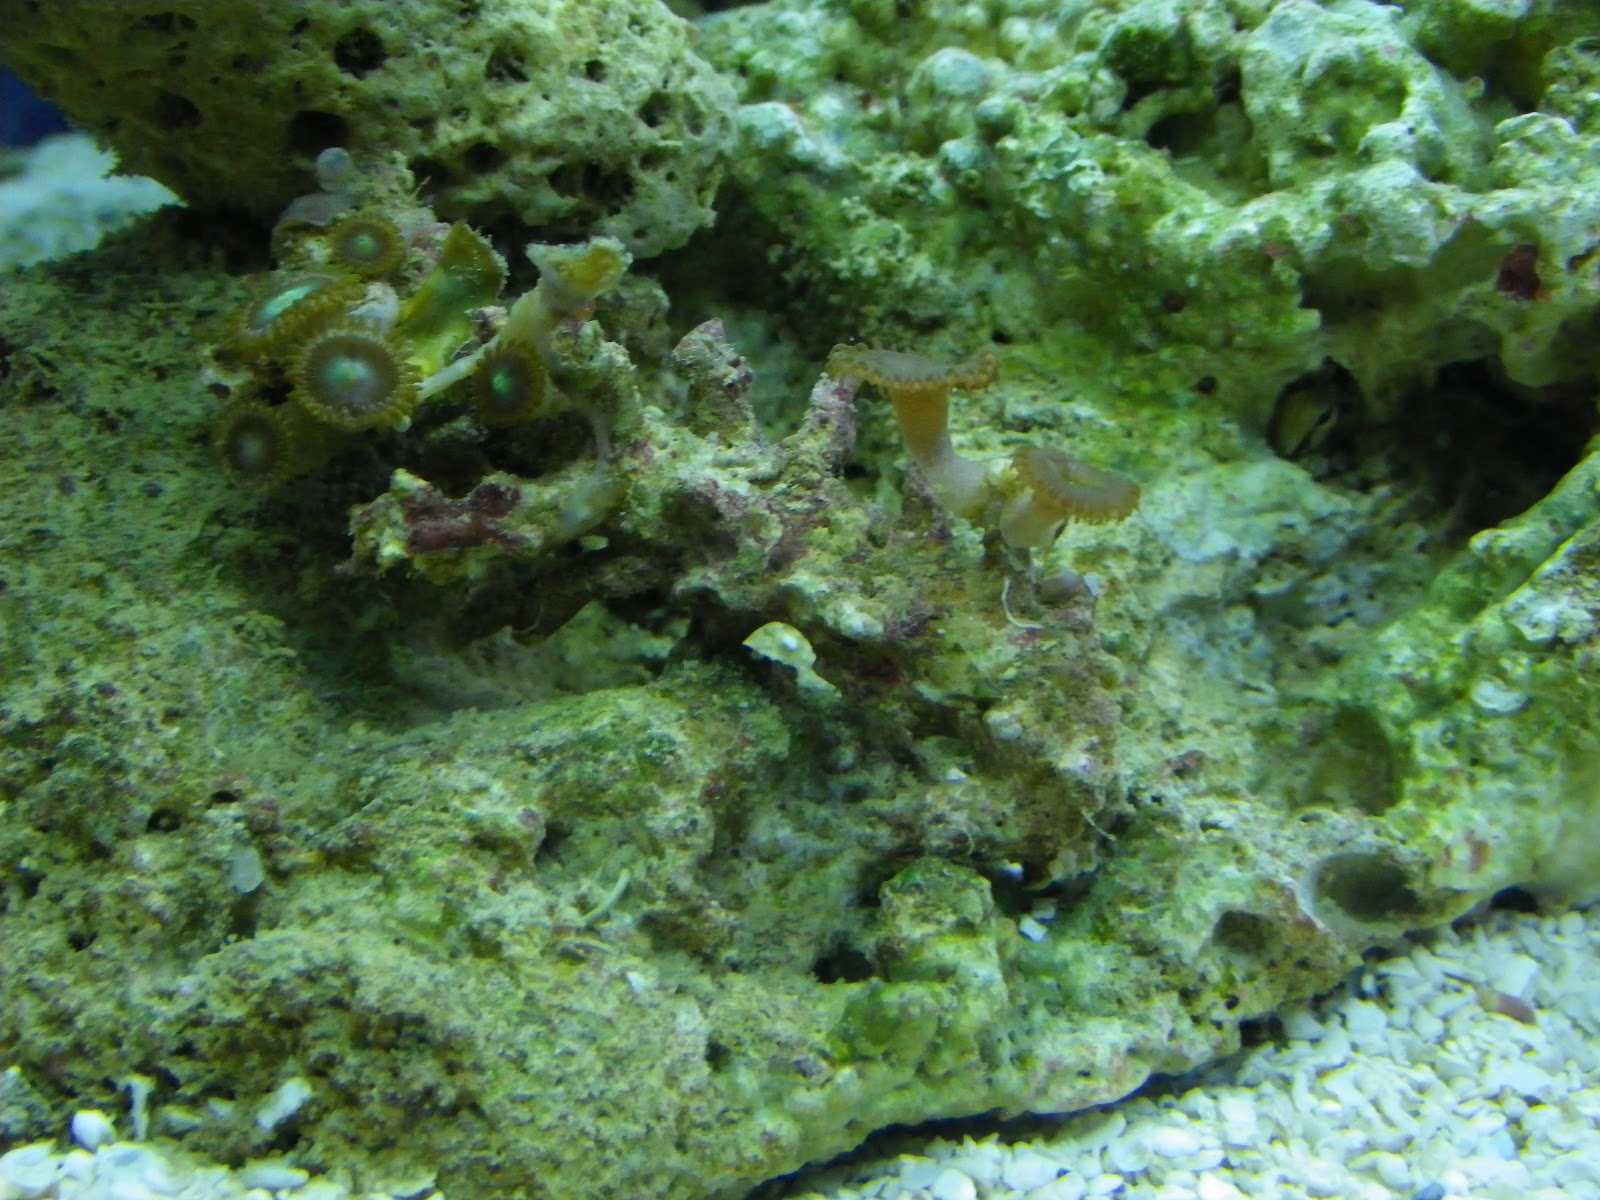
A sixth Zoanthid button is budding out in the lower left corner. It should open in a few days.

Blurry, but I know someone who can teach me how to take better pictures.


I am hoping these single yellow polyps adhere to some grains of sand so I can superglue them to a piece of rock.


Aiptasia Anemone - This is a pest and will need to be removed from the tank.


Tube worms are starting to come out of the rocks and sand.
Days 15 - 18, June 2011

It has been 15 days and my ammonia and nitrate tests have not detected even a tiny increase. This is most likely because the rock was well cured and did not have any die off in the new tank. I decided to take a risk and add some livestock without being sure the tank cycled. I started my cleanup crew with 2 Astrea snails and 2 Blue Legged Hermit Crabs. In one day the crabs ate all the undesirabl
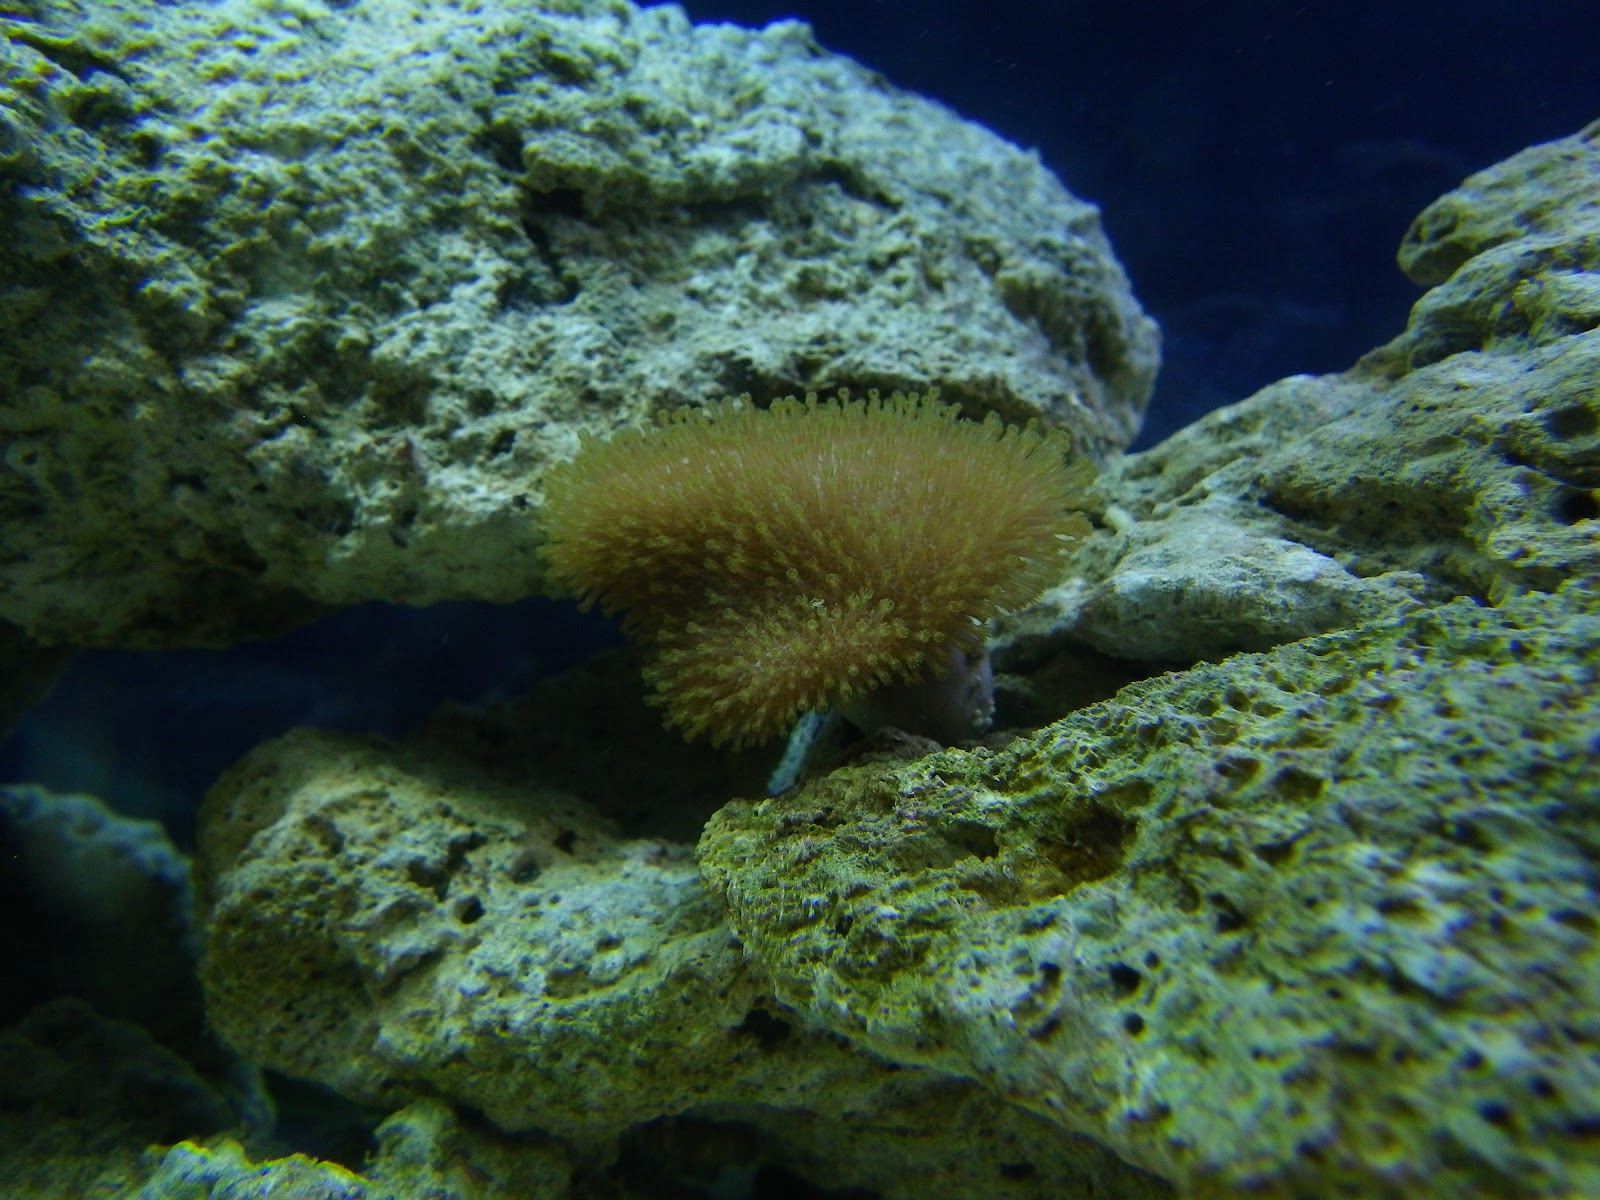
Hardy Toadstool Leather frag.

Ultra Green Palythoa and Blue legged hermit crab in back.

Zoanthid buttons starting to open up.
This tiny piece of rock was in the back corner of a tank at my local reef store. I noticed seven polyps on it and they were happy to make a good deal.

These polyps are tiny and are stretching for the light.

A close-up of the long thin polyps on the leather coral. They grab plankton from the water for food, but most of their nutrients come from zooxanthellae algae that live under the skin of the animal. Corals have a symbiotic relationship with this algae. The algae lives off the sun and the coral lives off the algae. The light I am providing for the corals is 50% 10,000k natural daylight and 50% actinic blue. The blue light replicates the spectrum that the corals get when they are 10-15 feet below the ocean surface.


Bristle Worms circled in red.
Day 2, May 29, 2011
I like the rock arrangement, but it is pretty bare in the tank. Not much trace of life except for one rock with a lone Ultra Green Palythoa on it and another with an aiptasia anemone on it. Even though the anemone is cute, I will eventually have to remove it because it is agressive and reproduces fast. The only other signs of life were two bristle worms and a few small amphipods.


Introduction/Setup
In early May there was a major catastrophe in my daughter Maya's goldfish tank. In a short time, Tiny, Speedy, Archie and Fuschia had died. Our family needed to turn a devastating situation into a positive opportunity. Now that we had the space, Maya and my wife Cindy encouraged me to start a reef tank again.
I gave up my 6 year reef keeping hobby in 1999 because I wanted to focus my attention and dedication on my newborn daughter. Now that Maya is 11, she is at the perfect age for us to start a reef tank together. I truly loved managing a reef tank and watching it grow. I can't wait to get into it again and share the hobby with Maya. So we begin our adventure of creating an indoor reef ecosystem.
My first reef aquarium, in 1993, was a 10 gallon soft coral and invertebrate tank with only one fish, a Black-Ray Goby. I wanted to limit additional food and waste production in the tank and create a natural self-contained ecosystem. Lower cost was the reason I went with a such a small tank, but it turned out to be a great size for many reasons.
Back then, I did constant research and was aided by Rick Oellers, owner of my local reef store. I was an avid reader of "Freshwater and Marine Aquarium" magazine and was inspired by Julian Sprung's articles. I learned about the Berlin Method of using live rock for biological filtration and Joubert who had success with deep sand beds. Combined with protein skimming, it was a simple and efficient system that proved successful. I did well keeping a Tridacna clam and Pagoda hard coral, but eventually the reef outgrew the 10 gallon and I moved it to a 30 long. Because of the additional space I was able to keep more hard corals including Staghorn Acropora and several more fish. A lot has changed since reefing in the 1990's, particularly making the hobby easier on the environment, but I am confident that my method will still have great results.
The Setup:
-JFW
I gave up my 6 year reef keeping hobby in 1999 because I wanted to focus my attention and dedication on my newborn daughter. Now that Maya is 11, she is at the perfect age for us to start a reef tank together. I truly loved managing a reef tank and watching it grow. I can't wait to get into it again and share the hobby with Maya. So we begin our adventure of creating an indoor reef ecosystem.
My first reef aquarium, in 1993, was a 10 gallon soft coral and invertebrate tank with only one fish, a Black-Ray Goby. I wanted to limit additional food and waste production in the tank and create a natural self-contained ecosystem. Lower cost was the reason I went with a such a small tank, but it turned out to be a great size for many reasons.
Back then, I did constant research and was aided by Rick Oellers, owner of my local reef store. I was an avid reader of "Freshwater and Marine Aquarium" magazine and was inspired by Julian Sprung's articles. I learned about the Berlin Method of using live rock for biological filtration and Joubert who had success with deep sand beds. Combined with protein skimming, it was a simple and efficient system that proved successful. I did well keeping a Tridacna clam and Pagoda hard coral, but eventually the reef outgrew the 10 gallon and I moved it to a 30 long. Because of the additional space I was able to keep more hard corals including Staghorn Acropora and several more fish. A lot has changed since reefing in the 1990's, particularly making the hobby easier on the environment, but I am confident that my method will still have great results.
The Setup:
- 10 Gallon tank.
- 1 Power Head.
- 2 Coralife 20 watt, 50/50 self balasted compact flurescent bulbs.
- A standard aquarium hood for incandescent bulbs. Painted white on the inside, modified heat shield to protect the longer bulbs and extra holes for ventilation.
- Light timer.
- Eheim Jager submersible heater.
- Small hang on the back filter with bio material (no carbon or sponge filter). I was planning to use my CPR Aquatics BakPak protein skimmer, but it turned out to be too loud. Eventually, I will modify it to make it quieter, but for now the live rock and good circulation should work just fine.
- 10 pounds of Fiji Premium live rock.
- 2 pounds of Tonga Fused Branch live rock.
- 2 pounds of Caribean Shelf live rock. (All of the rock was aquacultured and well cured. I initially wanted to get uncured rock because of the additional creatures, but I was assured that this rock was well seeded.)
- 2" bed of Aragonite sand.
- Tropic Marin salt.
- Kalkwasser to provide calcium and raise pH. Higher pH leads to calcifaction which is good for the reef and coralline algae growth.
- Reverse osmosis water.
-JFW
Subscribe to:
Posts (Atom)